Easy chili vegetal recipe
There’s nothing like wrapping your hands around a steaming bowl of hearty comfort as chili vegetal settles in. Imagine rich, smoky flavors simmering on your stove—a dish that warms you from the inside out without relying on meat. This crowd-pleasing recipe, loved by over 400 home cooks, proves plant-based meals can be deeply satisfying.
Perfect for game-day gatherings or quiet weeknights, this vegan-friendly blend comes together in under an hour. Swap regular broth for gluten-free options, and you’ve got a meal that welcomes everyone to the table. The magic lies in balancing spices: chili powder adds depth, while a dollop of cool sour cream brightens each bite.
You’ll love how simple pantry staples transform into something extraordinary. We’ll guide you through every step—from chopping veggies to adjusting heat levels. Whether you’re new to meatless cooking or a seasoned pro, this recipe promises to become your cold-weather staple.
Table of Contents
Introducing Your Cozy Chili Experience
Picture this: a frosty evening where the aroma of simmering spices wraps around your kitchen like a warm blanket. This recipe turns simple ingredients into a soul-warming meal that satisfies even the heartiest appetites. With minimal prep and maximum flavor, it’s designed for those nights when you crave comfort without the fuss.
Discover the Comfort of a Hearty Veggie Chili
Chunky carrots, bell peppers, and three types of beans create a satisfying texture that sticks to your ribs. Aromatic onion and garlic sizzle in the pot first, releasing their sweet earthiness. Then comes the gentle heat from spices—enough to tingle your tongue without overwhelming delicate palates.
Why You’ll Love This Easy-to-Follow Recipe
You’ll spend just 15 minutes chopping and sautéing before letting the stove do the work. The magic happens as tomatoes meld with smoky paprika and cumin, creating layers of flavor that deepen over time. Meat lovers often rave about the meaty texture from beans, while vegetarians appreciate the protein-packed foundation.
New cooks thrive here: clear instructions prevent guesswork, and substitutions are encouraged. Double the batch for game-day crowds or freeze leftovers for snowy weekends. Either way, you’ll master a recipe that feels like a hug in a bowl.
Essential Ingredients and Pantry Staples
The secret to a memorable bowl lies in your ingredient choices. Quality components build layers of taste that keep folks coming back for seconds. Let’s break down what you’ll need to craft this crowd-pleasing dish.

Fresh Produce, Beans, and Toppings
Start with tomatoes—fresh or canned—for a tangy base. Diced bell pepper adds sweetness, while minced garlic infuses earthy aroma. Black and pinto beans deliver protein and a meaty bite. Their creamy texture thickens the mix naturally.
Top your creation with cool contrasts: avocado slices cut through warmth, while sour cream adds richness. Crushed tortilla chips provide crunch. These finishes let guests customize each spoonful.
Spices and Seasonings for Authentic Flavor
Ground cumin forms the flavor backbone, offering smoky depth. Chili powder brings gentle heat without overpowering. Always bloom spices in oil first—this unlocks their full potential.
Use a heavy-bottomed pot for even cooking. It prevents scorching when sautéing onions or simmering the mixture. Quality tools ensure your efforts shine.
| Ingredient Category | Key Components | Flavor Contribution |
|---|---|---|
| Produce | Tomatoes, Bell Pepper, Garlic | Sweetness, acidity, aroma |
| Protein Base | Black Beans, Pinto Beans | Creamy texture, heartiness |
| Seasonings | Cumin, Chili Powder, Paprika | Smokiness, layered heat |
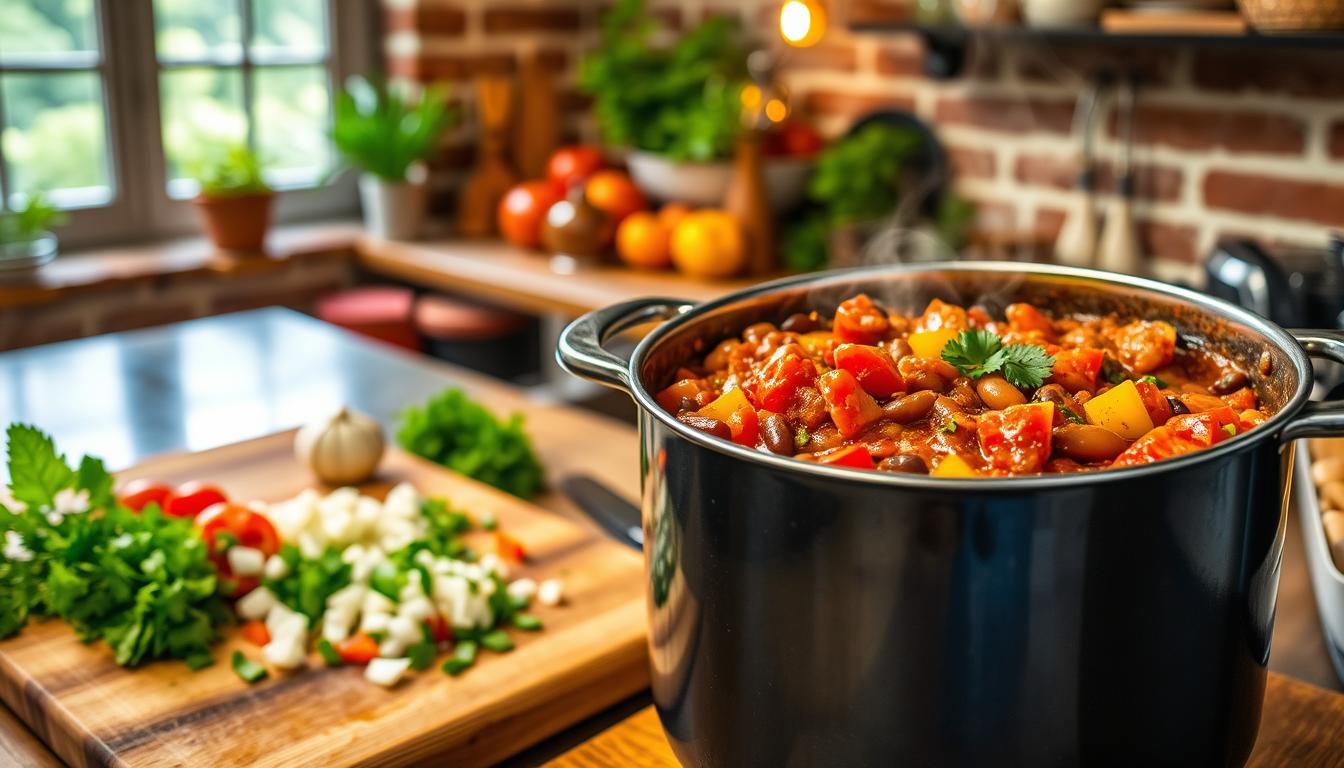
Step-by-Step Cooking Method
Unlock rich flavors through careful layering of ingredients and techniques. This method ensures every spoonful bursts with smoky warmth and satisfying texture.

Sautéing Aromatics and Building the Base
Heat 2 tablespoons of oil in a heavy pot over medium flame. Add diced onion, bell pepper, and carrots. Stir until softened—about 5 minutes. Toss in minced garlic, letting its aroma bloom for 30 seconds.
Now, sprinkle 2 tablespoons of chili powder and 1 tablespoon each of ground cumin and smoked paprika. Stir constantly for 1 minute to toast the spices. This step awakens their oils, creating a fragrant foundation.
Simmering, Blending, and Achieving the Perfect Texture
Pour in 4 cups of vegetable broth and 2 cans of crushed tomatoes. Bring to a gentle boil, then reduce heat. Let it bubble uncovered for 30 minutes, stirring occasionally to prevent sticking.
For velvety thickness, blend 1½ cups of the mixture until smooth. Return it to the pot—this trick maintains chunky veggies while boosting creaminess. Taste and adjust spices, adding salt or heat as needed.
Your patience rewards you with deep, layered flavors. Ladle into bowls and crown with fresh toppings like avocado or shredded cheese. Each step builds toward a balanced dish that comforts without complication.
Enhancing the Chili Vegetal Experience
Mastering the art of flavor balance turns good dishes into unforgettable meals. Small adjustments in seasoning and technique elevate your creation from hearty to extraordinary. Let’s explore how to fine-tune every spoonful.
Balancing Heat with Chili Powder and Spices
Start with 1-2 teaspoons of chili powder for mild warmth. Add smoked paprika or cumin to deepen the smokiness without extra heat. If it tastes flat, a splash of lime juice brightens the mix instantly.
Add salt in three stages: while sautéing veggies, after adding tomatoes, and just before serving. This gradual approach lets each layer develop fully. Too much water? Simmer longer. Too thick? Stir in broth slowly.
Tips for Homemade vs. Store-Bought Seasonings
Homemade blends let you control heat and sweetness. Toast dried peppers and grind them with cumin seeds for richer flavor. Pre-made mixes save time but check labels for excess salt or preservatives.
Cool fiery bites with a dollop of cream or dairy-free alternatives. Shredded cheese melts into creamy pockets, while fresh cilantro adds grassy notes. Let the dish rest overnight—flavors deepen by the second day.
| Feature | Homemade | Store-Bought | Impact |
|---|---|---|---|
| Flavor Depth | Customizable smokiness | Standardized heat | Richness vs. convenience |
| Salt Control | Adjustable levels | Often higher sodium | Healthier customization |
| Prep Time | 10-15 minutes | Instant use | Planning vs. speed |
Customization Tips and Creative Twists
Transform every bowl into a personalized masterpiece with smart add-ons. Toppings let guests build their ideal flavor profile while keeping core ingredients consistent. This approach works whether you’re feeding picky eaters or spice enthusiasts.
Adding Toppings: Sour Cream, Avocado, and More
Cool, creamy elements balance the dish’s warmth beautifully. Diced avocado adds buttery richness, while tangy sour cream mellows fiery notes. For crunch, try crushed tortilla chips or toasted pumpkin seeds.
Boost protein with extras like cooked lentils or quinoa stirred into individual servings. Pickled onions or jalapeños introduce bright acidity and heat control. Prep toppings ahead for quick assembly on busy days.
Adjust flavors creatively: a squeeze of lime brightens earthy tones, while maple syrup softens sharp spices. Store leftovers for up to three days, letting flavors deepen in the fridge. Simply reheat and add fresh garnishes.
These tweaks make the recipe adaptable for gluten-free, vegan, or low-sodium diets. Whether you crave extra heat or prefer milder tastes, your bowl becomes a canvas for culinary experimentation.
Serving Suggestions and Pairing Ideas
Elevate your meal presentation with thoughtful pairings that enhance every spoonful. The right sides transform your dish from satisfying to sensational, balancing textures and flavors effortlessly.
Perfect Sides: Tortilla Chips, Cornbread, and Salad
Crunchy tortilla chips offer a playful contrast to the rich base—scoop up bites or crumble them on top. Homemade cornbread brings sweet, crumbly balance. For freshness, toss a salad with diced bell pepper and lime dressing.
Leftovers shine in creative ways. Spread warmed black beans mixture over baked potatoes or layer it on nachos. Prep extra portions for quick wraps by folding it into tortillas with avocado.
“A sprinkle of fresh oregano wakes up stored flavors. I always add garlic when reheating to revive the aroma.”
Store leftovers in an airtight container for up to four days. Garnish with extra oregano and a pinch of smoked paprika before serving. This keeps meals vibrant while saving prep time later.
For gatherings, set up a topping bar with lime wedges, chopped bell pepper, and crispy tortilla chips. Let guests customize their bowls with creamy avocado or zesty oregano-infused yogurt.
Savoring Your Delicious Culinary Creation
The final moments before serving transform good dishes into extraordinary ones. Always taste your creation in the last 10 minutes of cooking. A teaspoon of fresh lime juice brightens flavors instantly, cutting through rich spices.
Drizzle olive oil over the pot for silky depth. This trick enhances vegetable broth-based recipes beautifully. Let the dish rest 5-8 minutes off heat—this time lets flavors marry into harmony.
Reheat leftovers in the oven at 350°F for even warmth. Serve with crispy tortilla strips for contrasting crunch. Each spoonful delivers smoky spices, tender beans, and zesty lime undertones.
Remember: great meals balance simplicity with thoughtful touches. Your final teaspoon of seasoning or olive oil swirl makes all the difference. Now savor every memorable bite!